[Click photos to enlarge]
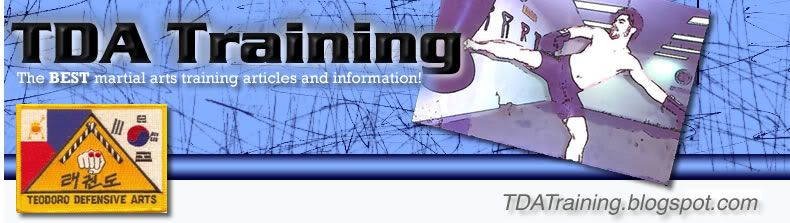
 1. (Photos 1-3) Mr. Teodoro uses a lead-off right to cover and close the gap. In #3, observe that Mr. Bertolino is now back on his heels. He cannot do anything except go backward.
 2.
2.  3.
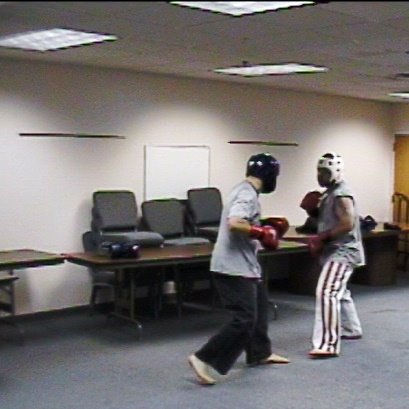
3. 4. (Photos 4-6) Mr. Teodoro steps through with the right foot and throws the straight left to the body. Though Mr. Bertolino is covering the head and upper chest, he cannot cover everything. Mr. Bertolino’s feet are out of position as he backpedals so he cannot evade the punches.
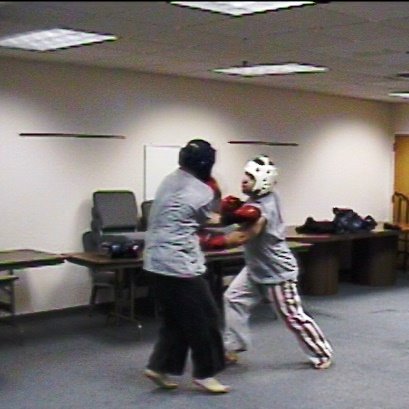 5.
5.  6.
6. 7. (Photos 7-8) Mr. Teodoro Continue to chase and stepping forward with the left, use a right reverse punch. Mr. Bertolino has his weight on the front leg and is back in his base stance (left-lead/orthodox). While Mr. Bertolino is still absorbing another punch in photo #8, look at his right foot. Bertolino changes strategy and stops getting hit.
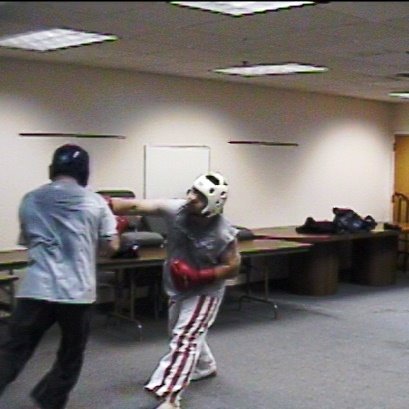 8.
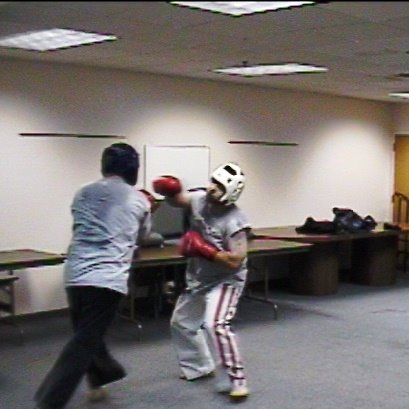
8.Two things this series illustrates:
Blitz and how it can be used to score multiple shots and off-balance your opponent.
The step-around footwork. Notice how Mr. Bertolino went away from the power of the technique, the lead-hook. Also notice how he didn’t just run. He stepped, and then pivoted so that he could defend or attack and brought the situation back to an equal footing. Mr. Teodoro did the same by bringing back his right foot in 13 & 14 so that he wasn’t out-flanked.
No comments:
Post a Comment